Clothes are Harder than Faces: Restoring Photos with AI

New Life into a Faded Photograph
This animation shows the step-by-step evolution of a single photo — from its damaged original state to a fully colorized and enhanced version using AI tools. What starts as a scan of an old family photo becomes a vivid, reimagined portrait through a mix of restoration, generation, and creative decision-making.
This blog has long been a space where I share the many photo stories I’ve captured over the years. But recently, due to changes in my life, I haven’t been shooting as much as I used to. Instead, I’ve taken on a new challenge: digitizing, organizing, and restoring my family’s photo and video archive.
So far, I’ve scanned tens of thousands of images and digitized dozens of old tapes. I’ll dive into my archiving and organization methods in a future post — but today, I want to focus on something that’s become a real passion: photo restoration using AI.
Now, I’m not an AI expert, and I’m fully aware of the ethical questions that arise when using artificial intelligence to alter historical images — especially in journalistic or documentary contexts. That said, my goal here isn’t to fabricate history. It’s to help close the emotional gap between us and the faded memories in these old photos — to bring back a sense of closeness and immediacy that time has worn away.
I wanted to show that AI isn’t a one-click solution — it’s a guided, creative process driven by memory, authorship, and emotion.
This isn’t meant to be a tutorial — just a look at what I’ve been working on. I’ll try not to get too technical and keep the focus on the creative side of things.
How does AI image generation work?
Every time you generate an image with AI, you're using a model. Even if you’ve never trained one yourself, understanding how models work is essential if you want results that match your vision.

ComfyUI
ComfyUI is the tool I use to build custom AI workflows for photo restoration. It lets me visually design how AI processes my images, step by step. There is a rich community that shares workflows and enables users to learn from other’s experiences.
Wait — what’s a model?
Let’s try a quick experiment. Read the description below and pay attention to the mental image that forms in your head:
It’s a cold, snowy day in what looks like a city park or urban square. Snow is gently falling, and the ground is completely covered in a soft white blanket. In the foreground, there’s a large tree trunk on the left side, and a low stone wall runs along the bottom edge of the scene, partly buried in snow.
Near the center of the image, a young girl—maybe five or six years old—is down in the snow. She's wearing a puffy winter jacket with a hood, dotted with little colorful patterns. Her mouth is wide open in a shout or cry, her expression a mix of frustration and emotion. Her body language says she may have just fallen or is calling out for someone.
Facing her, and standing with their back to the camera, is an adult dressed in a dark winter coat with a furry hood. They’re carrying a backpack with a colorful design, possibly floral. The person seems still — maybe a parent or guardian — watching or waiting.
In the background, a gray concrete wall stretches across the frame, covered in black graffiti. Behind it are a few bare trees and snow-covered shrubs. A bright blue lamppost stands out against the muted winter tones, adding a splash of color.
The atmosphere is quiet and wintry, but the emotion from the girl is strong — raw and real — in the middle of this otherwise still scene.
Did you picture that? Did your brain build an image?
You used all the visual information you’ve accumulated over your life — scenes you’ve experienced, photos you’ve seen, stories you’ve read — and stitched it together into a mental picture. That’s roughly how an AI image generation model, also called a checkpoint, works.
You feed a model with thousands (or millions) of images, each described with key information. Then, when a user enters a prompt — a short description of the image they want — the AI draws on the patterns it has learned from similar images and generates something new that reflects those associations.
Prompts and tags
Prompting is how you tell your computer what to make. You might type something simple, like:
“dog”
…and it will return an image of a dog. But the image it generates isn’t necessarily your dog. It’s not the dog your neighbor imagined either. It’s a generic result — a kind of visual average of what the model knows about "dogs."
Now let’s get more specific:
“poodle dog with red collar”
This adds more direction, but you still won’t get exactly what you pictured in your mind. And this is the main challenge of AI image generation today: getting the model to match your vision exactly. The tech is powerful, but precision takes work.
Say you’ve now got your dog, and next you want:
“aardvark in pajamas doing push-ups in the snow”
Well, if your model wasn’t trained on any images of aardvarks, or aardvarks in pajamas, or even the action of push-ups — you’re out of luck. The model has to know what those things are, visually. Same goes for the concept of "cold" or "snow" — those need to be baked into the training set too.

It gave me a kangaroo. Not what I had in mind, but... sure, close enough.
So how do we make that easier?
Instead of writing an entire essay for each training image, we tag them. Tags are short, descriptive keywords that help models learn faster and more effectively. Let's go back to that snowy park scene above.
We might tag it like this:
Environment:
outdoor,urban,winter,snowfall,graffiti wall,tree trunk,cold weatherSubject:
child,girl,shouting,snow play,woman with back to camera,hooded jacket,backpackComposition:
foreground blur,rule of thirds,depth of field,subject in motion,photographic portraitStyle:
street photography,documentary style,emotive expression
Once you have enough images with these kinds of tags, your model can start to “understand” what those concepts look like visually — whether it’s a dog, an action, a camera style, or a feeling.
Most users never train their own models — this information is just to help you understand how the AI “thinks” and why it behaves the way it does.

Not exactly how you pictured it, right? Or was it close?
Taming the beast
Alright — now you’ve got a sense of how to guide your AI platform to generate something close to what’s in your head. That’s great for creatives who don’t need pixel-perfect results. And honestly, that’s where most AI-generated content is today: ads, stock visuals, concept art — often based on generic prompts that are “good enough” to fit the subject.
But that’s not what we’re doing here.
We’re not looking to create a generic version of a person.
We don’t want an image of a man wearing a hat in the 1940s.
We want that image. That person. That exact photo, but restored.
So how do we make sure the AI understands that?
We use a tool called ControlNet. ControlNet gives the AI a visual reference — like a pose, an outline, or even just the structure of the original photo — so it has something concrete to follow instead of guessing from scratch. It’s visual input, not just text. It’s how we keep the soul of the original image intact.
There are several types of ControlNet, and each one analyzes your source image differently:
Canny detects the edges and outlines.
OpenPose maps out body position and even facial features using stick-figure skeletons.
Lineart traces the structure like a sketch.
And others help with depth, segmentation, or style.
By choosing the right one — or combining a few — we can tell the AI:
“Start here. Stay true to this. Now bring it to life.”
Restoring
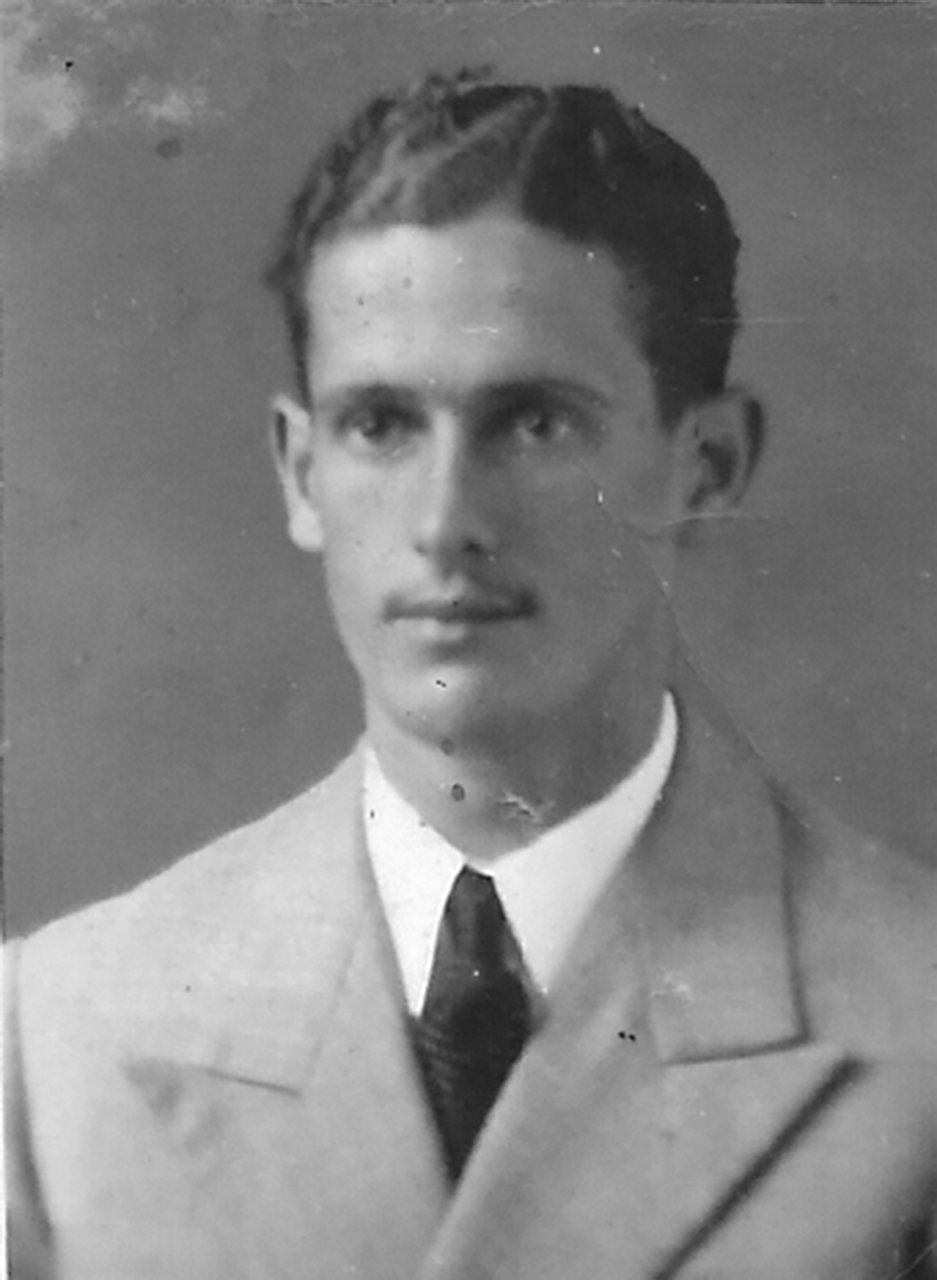
This is the photo we’ll be working with — a picture of my grandfather. He was born in 1919, so I’d estimate this was taken in the early 1940s. It’s focus is soft, it has some creases and spots, but it’s in decent shape.

Original Image
This is my grandfather Alberto in the 40s. The photo was scanned, this is not a photo of a photo.
My restoration process is made up of four key steps:
Cleaning – Removing physical damage like tears, creases, stains, or dust.
Colorizing – Carefully applying realistic color based on context and intuition.
Detail regeneration – Using AI tools to reconstruct missing or blurred areas, like facial features or clothing patterns.
Upscaling – Enhancing resolution and clarity for display or printing.
Step 1 - Clean up and face enhance

The first step in my process is running a workflow that identifies damaged areas in the photo and tries to restore focus—especially on the face. Whether it works depends a lot on the quality of the original image. If the result isn’t quite right, I’ll touch up the problem areas manually in Photoshop and run the workflow again. The goal here is to save time: I’m using AI to speed things up, not to fix every single detail by hand—unless I have to.

Cleanup and face restore
You can see that the workflow added some color to the lips but didn’t fully remove all the damaged spots. I went back and cleaned those up manually in Photoshop afterward.
Step 2 - Colorization
I experimented with several colorization methods and got mixed results. To start, I used ControlNet to extract the image’s depth, facial features, and outlines.

The first method I tried relied heavily on the outline and added color with minimal generation. The image on the left shows the result straight from the model. The middle version has contrast applied to bring out more detail, and the image on the right is the faded original overlaid onto the source photo to restore texture and structure.

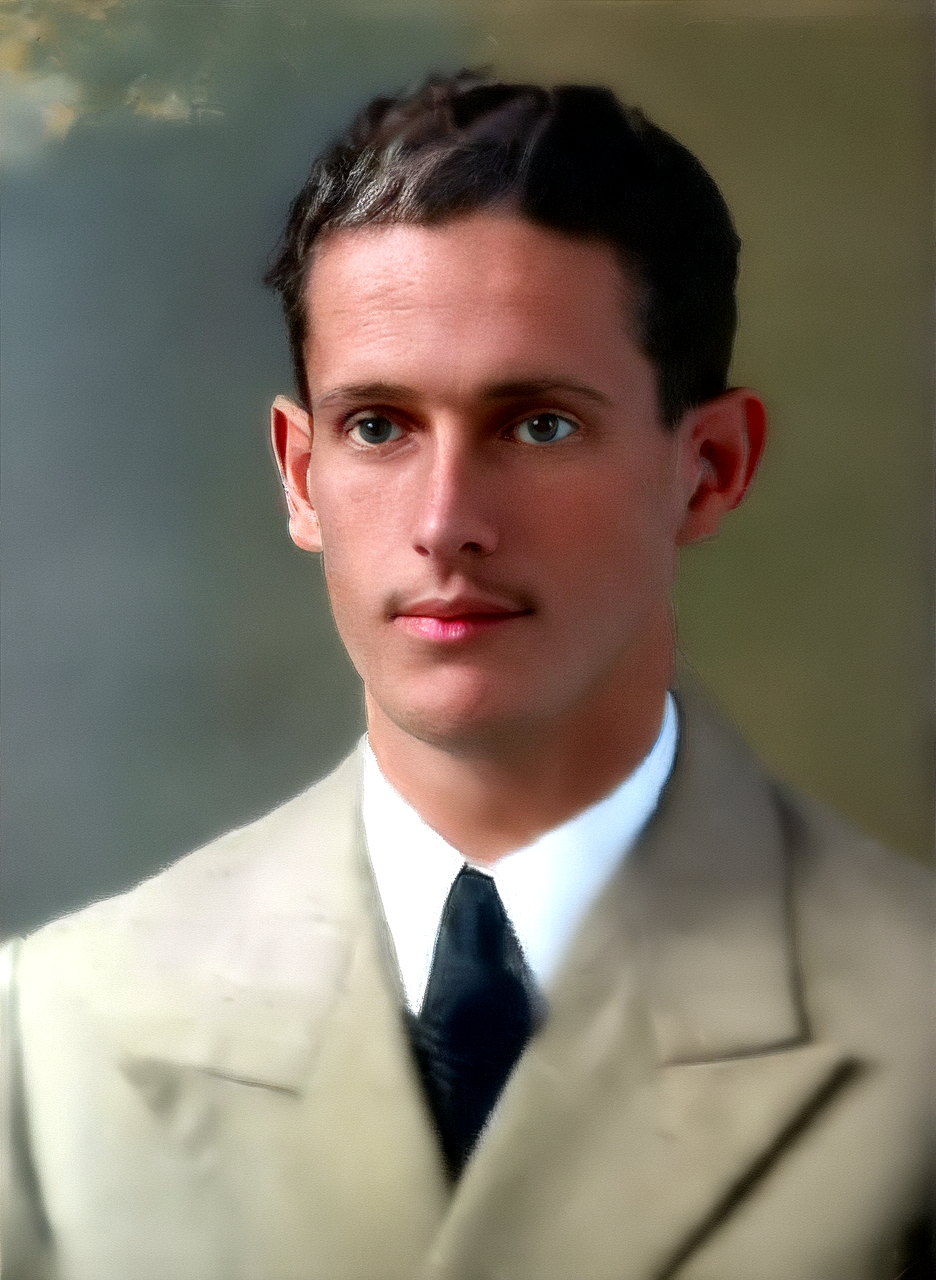
First try
The color and likeness are pretty decent, but there are still quite a few artifacts. The skin tone feels too light, and his eyes were actually brown. This is still definitely him, though.
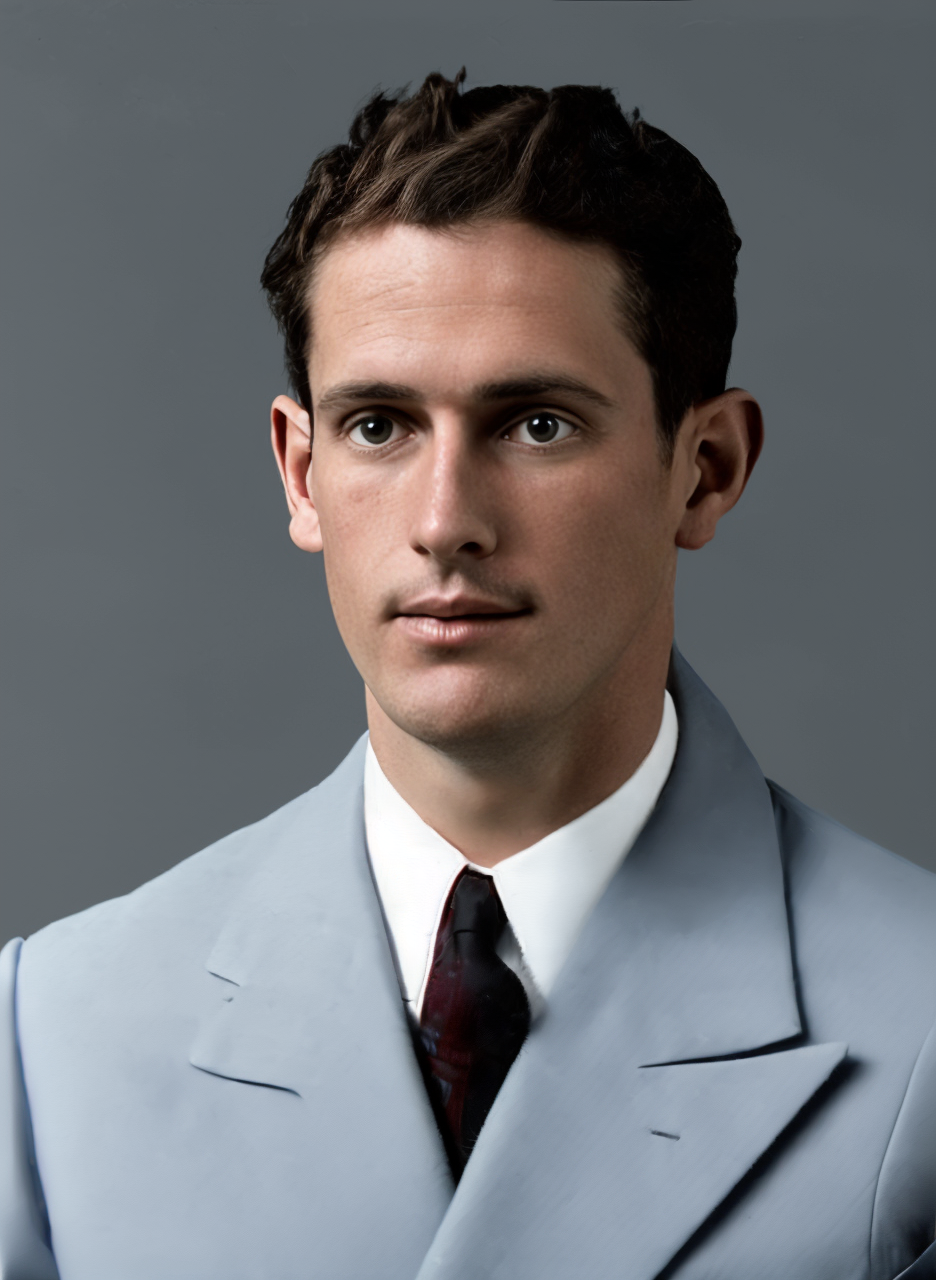
Then I tried a slightly different workflow, that involved a lot more prompting and many tries until I got a decent result.

Second try
This run involved much more image generation, which introduced some subtle differences in his facial features. Anyone who didn’t know my grandfather well probably wouldn’t even notice.
Step 3 - Adding detail
Now I want to improve the texture of the clothing — and at this point, we’re clearly starting to make things up. This isn’t really “restoration” anymore; it’s more like updating and reimagining the original.

Generating new content
The issue here is that the model I’m using wasn’t trained with early 20th century clothing. It was probably trained with modern brand new clothes. To make this more authentic, I’ll need to either find a model trained with the correct clothing or train a Lora myself (more on that to come).
This project started as a personal experiment, but it’s quickly grown into something deeper — a way to reconnect with memory, preserve family history, and explore the creative possibilities of AI. I’m still refining my workflow and learning with every image, but the results so far have been rewarding. Next, I’ll be working on training a custom model with historical clothing references to push the authenticity even further. If you’re curious about the process or working on something similar, feel free to leave a comment — I’ll be posting more soon about AI tools, techniques, and restoration experiments.